Homeschool Science Lab: DNA Extraction Lab
YES you can do science labs at home! In this Homeschool Science Lab: DNA Extraction Lab we are going to not only talk about DNA but your student is going to be able to extract DNA from a strawberry and even from themselves!

One of the big concerns about homeschooling for people is science, how to teach it, and how to tackle labs at home. This DNA Extraction Lab will teach your child about DNA – its structure, purpose, how it works. Then they will get the chance to actually extract DNA with things you most likely already have around your house!
About DNA
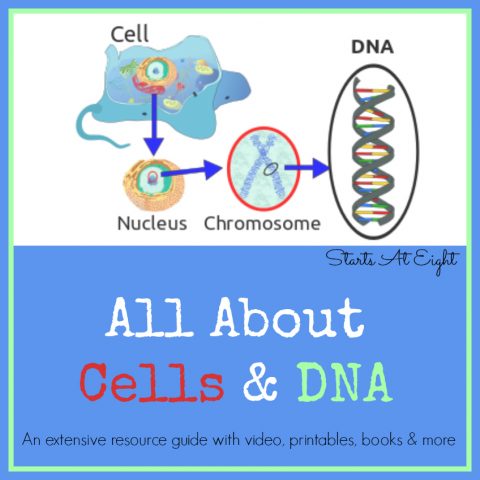
To learn more about DNA itself check out this post that includes definitions and tons of resources for learning about both cells and DNA.

Also be sure to check out this video:
Homeschool Science Lab: DNA Extraction Lab
Every living being that surrounds us is made up of a unique DNA. This DNA can be thought of as programming that tells our cells what each of their jobs is. While it is one of the most important aspects to all life itself, it cannot be seen with the naked eye. A fascinating way to look closely at this function from home is through a DNA extraction lab.
During this project, you will isolate the DNA and extract it from the cells of a living organism in order to further examine it. This can easily be done as a fun and highly education project, and it uses simple ingredients that can often already be found in your home!
DNA Extraction Lab – Strawberry Extraction
Fun Fact: Strawberries have more DNA than any other fruit!
For this project, you will need:
- 3 strawberries
- 90 ml water
- 15 ml dish soap
- 1 tsp salt
- 10ml cold 90% rubbing alcohol
- Strainer
- Cup
- Spoon
- Small glass bowl
- Wooden skewer
- Plastic bag
- Safety goggles
Step 1: After placing your strawberries into the plastic bag, smash them with your fingers so that they form a paste
Step 2: In the cup, combine your salt, water, and dish soap. Mix the ingredients together and then add it to the bag of strawberries, sealing it tightly.
Step 3: Mix the solution into your strawberries using your fingers and the outside of the bag. You will notice that when combined, it should appear frothy.
Step 4: Empty the mixture into the glass bowl using a strainer to separate the liquid from the seeds and larger pieces.
Step 5: Begin to slowly pour in the rubbing alcohol. You will see a separation beginning to occur.
Step 6: After leaving it to develop for a few minutes, the DNA will become visible on top. Using your wooden skewer, you can carefully remove the DNA strands from the rest of the mixture.
How Does It Work?
Strawberries that are commercially grown contain 8 pairs of chromosomes. That is 4x the amount that humans have per cell. You can use any fruit in this experiment, but you will yield the most success with strawberries because of their special enzymes. Pectinases and cellulases work to break down the walls of each cell.
The solution that was mixed with the strawberries works by breaking apart the protein chains (with salt), and the alcohol helps you to easily identify the DNA because DNA is not soluble in alcohol. Additionally, the salt helps to prevent the protein from reattaching to the DNA strands. Rubbing alcohol is not as dense as water, so it will always rise to the top of the mixture, leaving your end result easy to identify. You will able to take a little closer look by using a special type of microscope, read more about how that works at http://microscopespot.com/.
The Benefits
While this is a simple experiment, you can see how it is possible to do this virtually anywhere. The ingredients and supplies are easily accessible, and more than likely, you will already have most of the items that you need. Whether you would like to bring this project into a classroom or do it from home as a part of homeschooling curriculum, it is suitable for either environment.
DNA Extraction Lab – Human Testing
If you would like to test human DNA, there is a way to do this DNA extraction lab at home too!
The ingredients needed are:
- 500 ml bottled water
- 3 clear plastic cups
- Clear dish soap
- 1 tbsp salt
- 100 ml rubbing alcohol
- Food coloring
Step 1: Dissolve your salt in one of the plastic cups by pouring your bottled water into it.
Step 2: Extract 3 tbsp of the salt water and place it into a different cup.
Step 3: Without swallowing, gargle the salt water for 1 minute.
Step 4: Spit the water back into the plastic cup.
Step 5: Gently stir in one drop of dish soap, trying not to create any bubbles into the mixture.
Step 6: Take your remaining empty cup and mix the rubbing alcohol with 3 drops of food coloring of your choice.
Step 7: Pour that mixture into your salt water and wait a few minutes. You will see the strands beginning to form on the surface.
By vigorously gargling the salt water, your cheek cells were collected. With the help of the dish soap, the cheek cell membranes are broken down, thus causing the DNA to be released. Just like the other experiment, it should be noted that DNA is not soluble in alcohol. Any of the other substances that were in your mouth will be directly dissolved into the water, leaving behind your own DNA to examine!
By showing kids this fun and easy approach to science, it will satisfy some of the natural curiosities that occur. Learning about the things that we cannot see brings a greater understanding to the bigger picture of how the world works. It can also ignite the drive to participate in other home science experiments!
Author Bio: Jude McLean is a parent and an avid parenting blogger interested in homeschooling and helping kids thrive. You can find more of his writings over at Serious Parenting.


November 15, 2018 @ 1:48 pm
We did this experiment as part of our Co op today and it was a massive hit! Also really appreciate the videos. Interestingly enough, the NIH vid won’t play on YouTube, but your embedded video plays great ??). Thanks do much for this resource!
November 19, 2018 @ 8:49 am
Awesome! So glad you enjoyed this! How strange that my embedded one plays and not the one on YouTube!